Shipping can often be the most time-consuming part of running an online store. Between comparing carrier rates, printing labels, and updating tracking details, it can quickly become overwhelming. The good news? With the Hippoo App and the Hippoo Shippo Integration for WooCommerce, you can generate shipping labels directly from your mobile device—in just seconds.
Why Hippoo + Shippo?
Hippoo is a mobile-first solution designed to simplify e-commerce management. It allows you to run your online store right from your smartphone—handling orders, inventory, customer communication, analytics, and now, shipping.
Shippo is a leading multi-carrier shipping platform that connects your store to dozens of global and local carriers. By combining Hippoo and Shippo, you can:
- Generate labels instantly from your WooCommerce orders.
- Access discounted shipping rates.
- Automate tracking and order updates.
- Manage the entire shipping process from one dashboard.
This integration means no more switching between apps or logging into multiple carrier accounts. Everything happens in one smooth workflow.
Key Benefits
- Mobile-Friendly: Create and download labels right from your phone, wherever you are.
- Time Savings: Generate labels in seconds, instead of spending minutes or hours.
- Discounted Rates: Access Shippo’s pre-negotiated carrier discounts.
- Automation: Tracking numbers and shipping updates are synced automatically to WooCommerce orders.
- Multi-Carrier Support: Choose from USPS, UPS, FedEx, DHL, and many more.
- Unified Dashboard: Manage orders, analytics, inventory, and shipping in the Hippoo App.
Step 1: Install the Hippoo Shippo Integration Plugin
- Log in to your WordPress dashboard.
- Go to Plugins → Add New.
- Search for Hippoo Shippo Integration for WooCommerce.
- Install and activate the plugin.
Step 2: Create Your Shippo Token
To connect WooCommerce with Shippo, you’ll need an API token.
- Log in to your Shippo account (create one if you don’t already have it).
- Go to Settings → API.
- Generate a Live Token (for real shipments) or a Test Token (to experiment without charges).
- Copy the token.
Step 3: Add Your Shippo Token to WooCommerce
- In your WordPress dashboard, navigate to:
WooCommerce → Settings → Shipping → Shippo. - Paste your API token into the Shippo Token field.
- Save changes.
Your WooCommerce store is now fully connected to Shippo through Hippoo’s plugin.
Step 4: Generate Labels from Mobile
Once connected, generating labels is effortless:
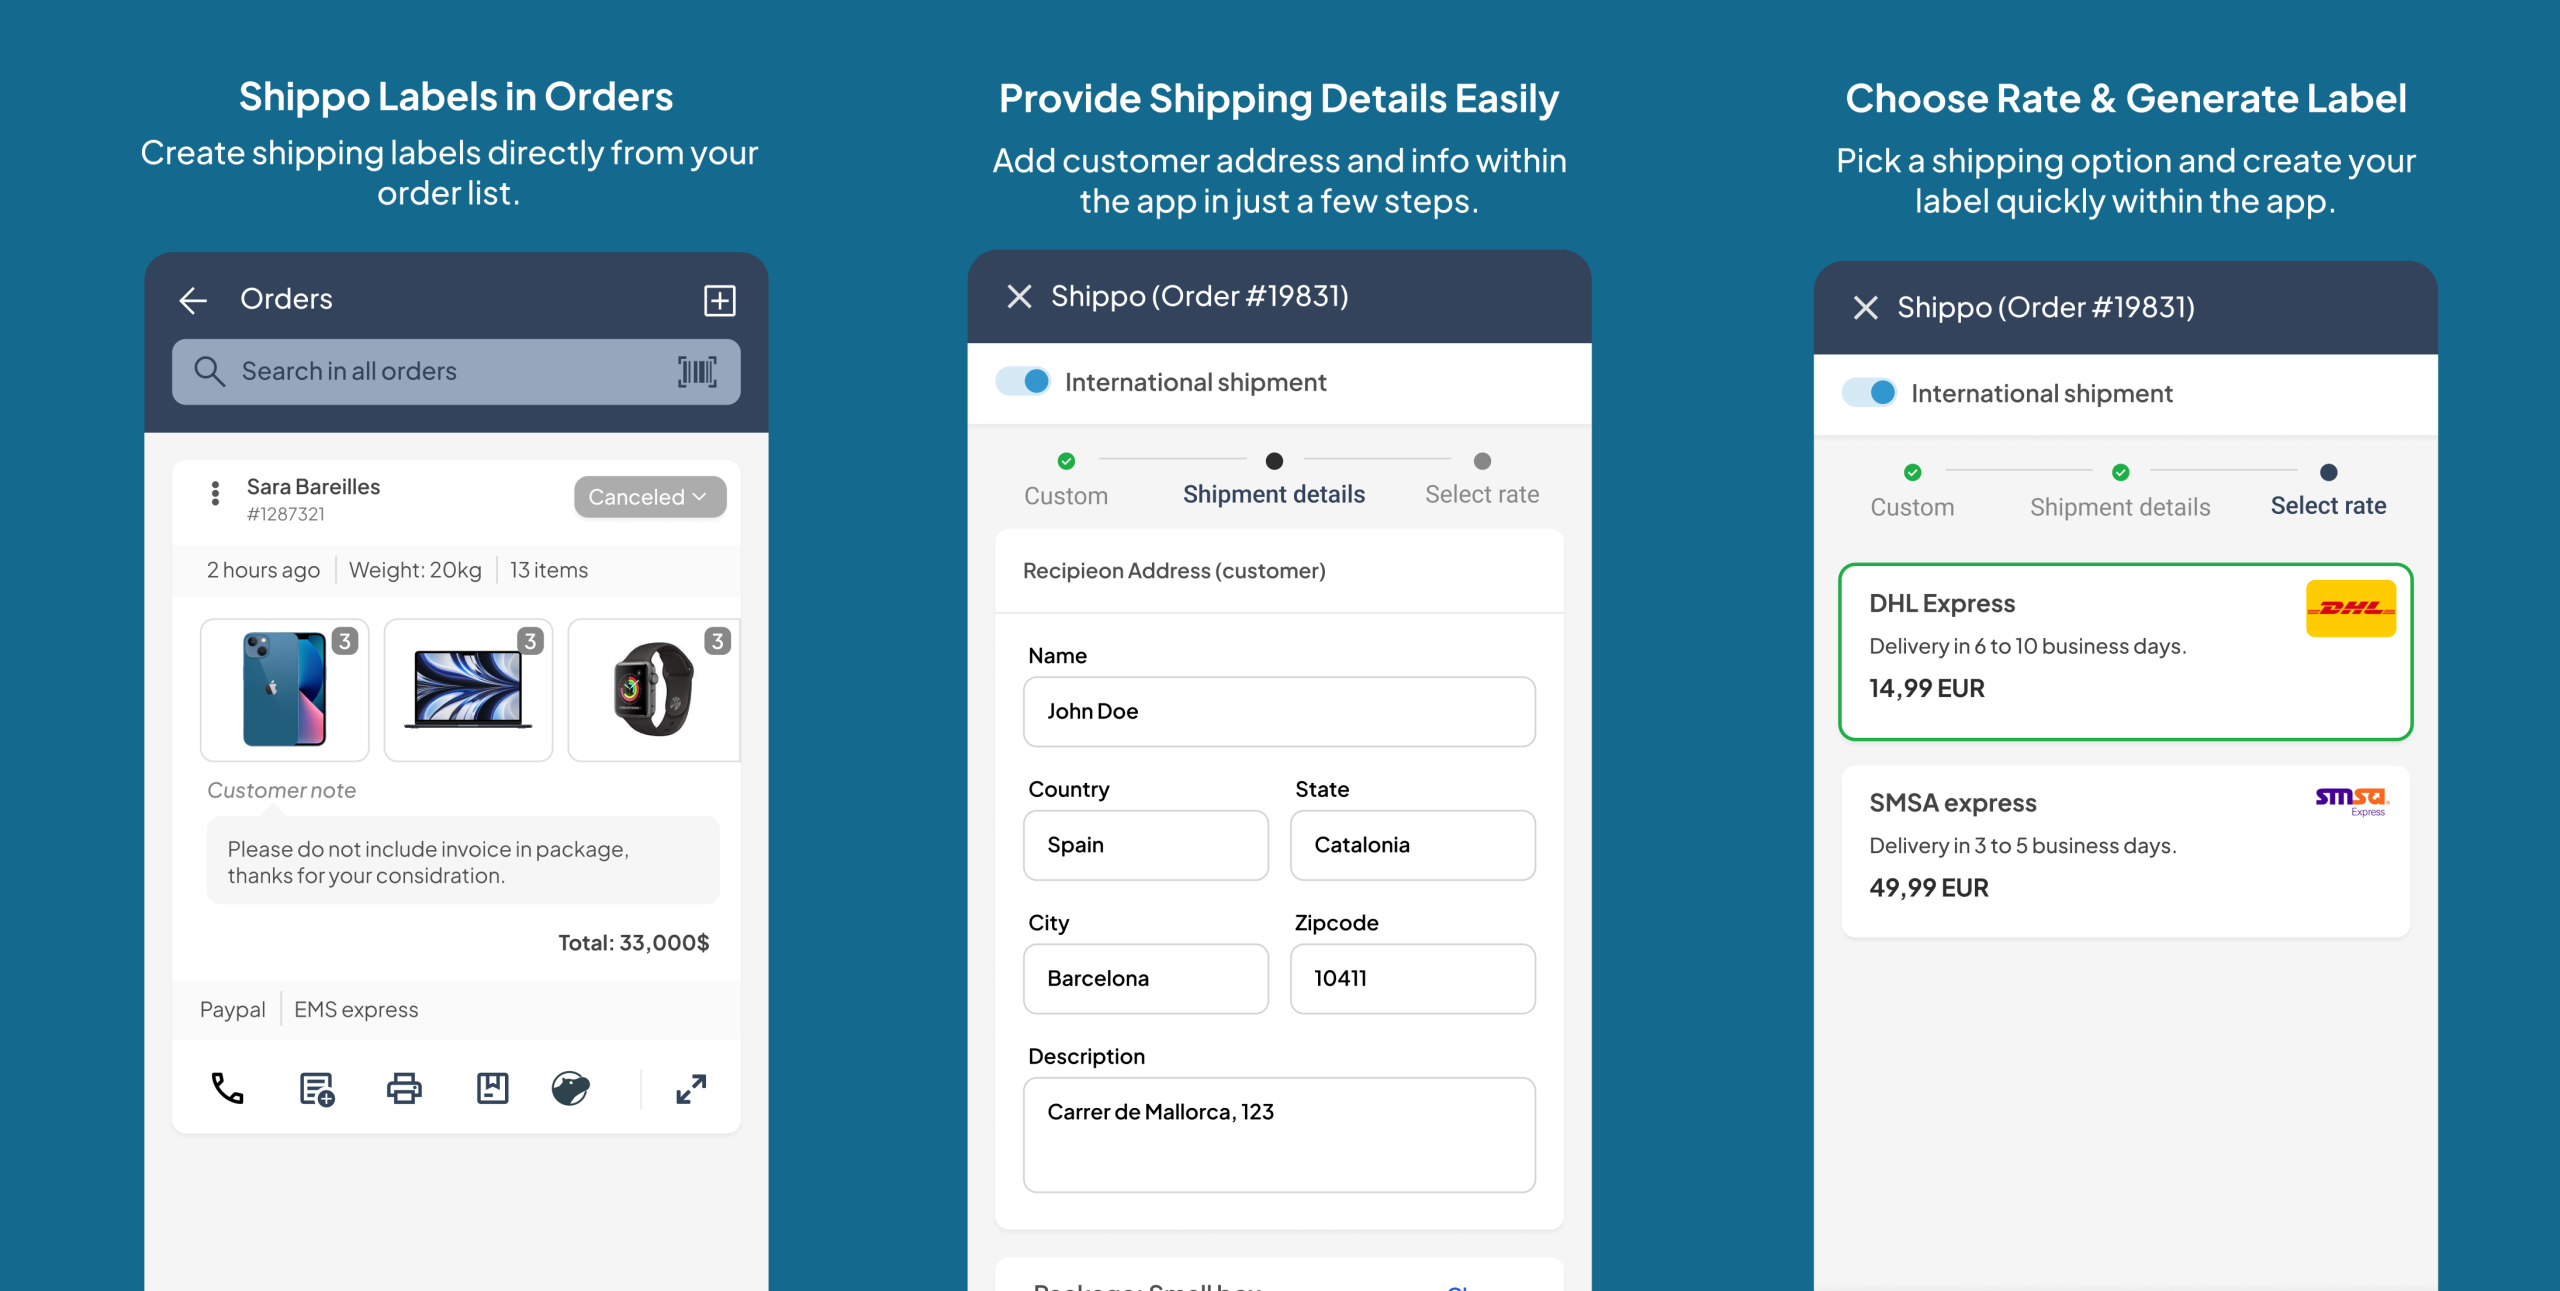
- Open your WooCommerce admin on mobile (or use the Hippoo App).
- Go to Orders and select the order you want to ship.
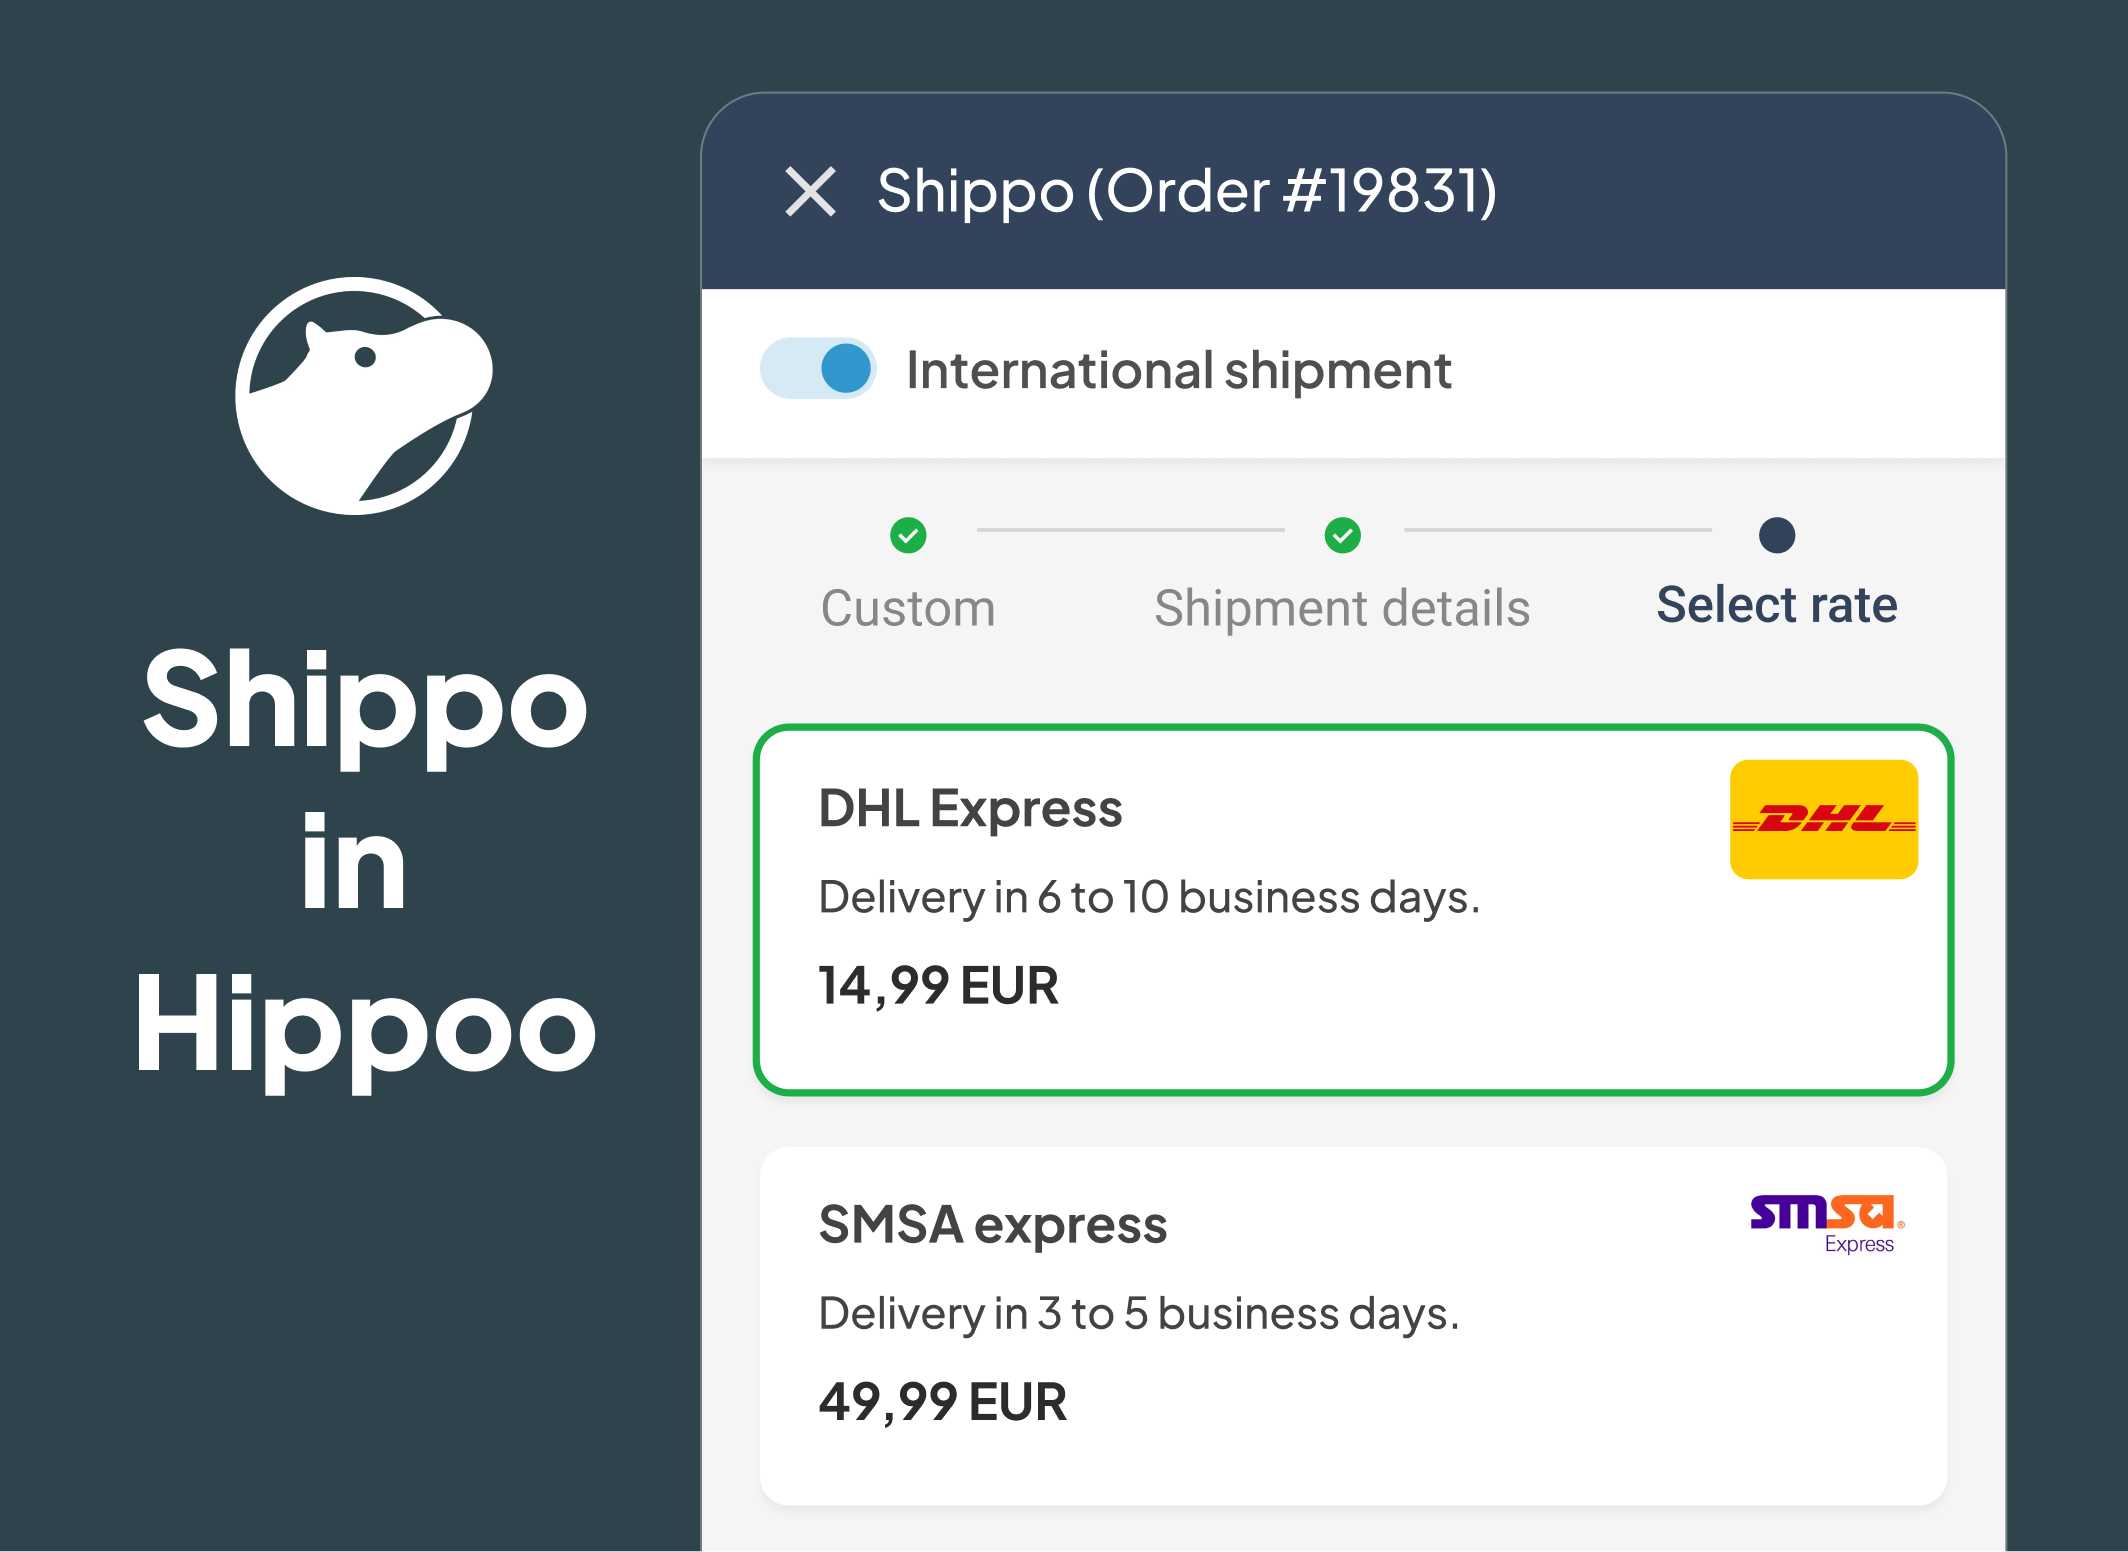
- Tap to Shippo icon.
- Enter the package weight and dimensions.
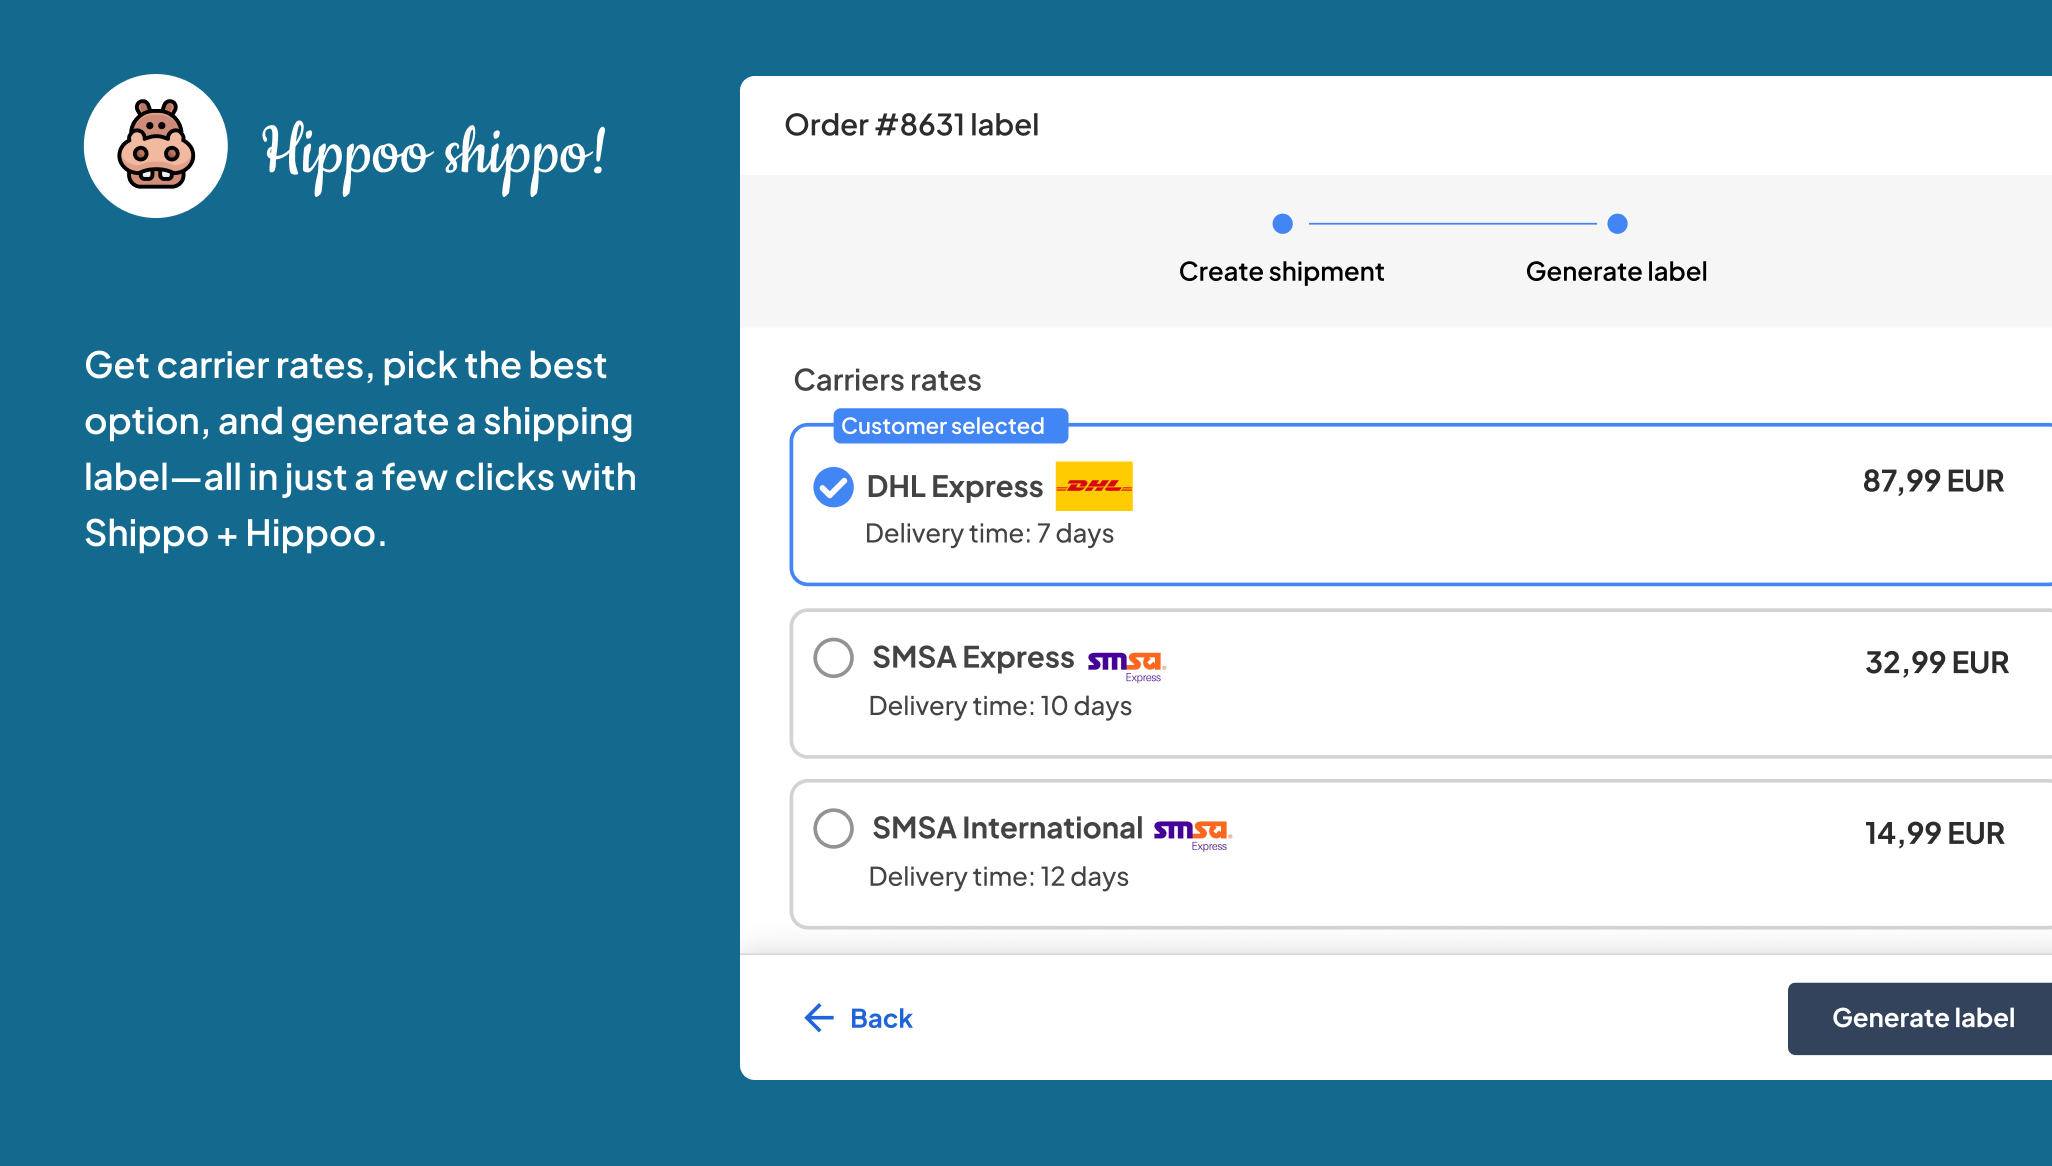
- Compare carrier rates and select your preferred option.
- Tap Purchase—and instantly download or email the shipping label.
- Tracking information is automatically added to the order and sent to your customer.
Pro Tips for Smooth Shipping
- Test Before Going Live: Use your test token to ensure the setup works before generating live labels.
- Bulk Label Creation: Save time by generating multiple labels at once.
- Return Labels: Provide hassle-free returns by creating prepaid return labels.
- Mobile Notifications: Stay on top of your shipments with updates from the Hippoo App.
Final Thoughts
The combination of Hippoo and Shippo transforms WooCommerce shipping into a fast, mobile-first experience. No more wasted time, no more complicated workflows. With discounted rates, real-time tracking, and full automation, you can focus on what really matters—growing your business.
With the Hippoo App in your pocket and the Shippo plugin powering your WooCommerce shipping, you can run your entire store—from sales to fulfillment—anytime, anywhere.